Thursday 21 February 2013

A Tutorial - Lined, Zippered Purse

Finally my first tutorial!   This is for a lined, zippered purse - it can be made bigger, smaller or any size you like.  I hope my instructions are easy to follow. 


This is what you will need:

2 x pieces of fabric for the outside of your purse (measuring 12cm x 17cm or 4.7" x 6.7" inches approximately)
2 x pieces of fabric for the lining  (same size as the outer purse pieces)
1 x 7" inch/18cm zipper or longer (as long as the zipper "teeth" section is longer than the width of the fabric)
1 x piece of ribbon to co-ordinate with your fabric to use as tag (12cm/4.7"inches long)

Note - I use a 1cm seam allowance, that is included in the measurements above.


Zipper foot
Attach your zipper foot to your machine, now line up the zipper to the right side of the outer fabric and pin, making sure it faces the outside of the zip and the ends of the zipper extend beyond each end of the fabric. Sew along the length of zipper,  as close as you can.


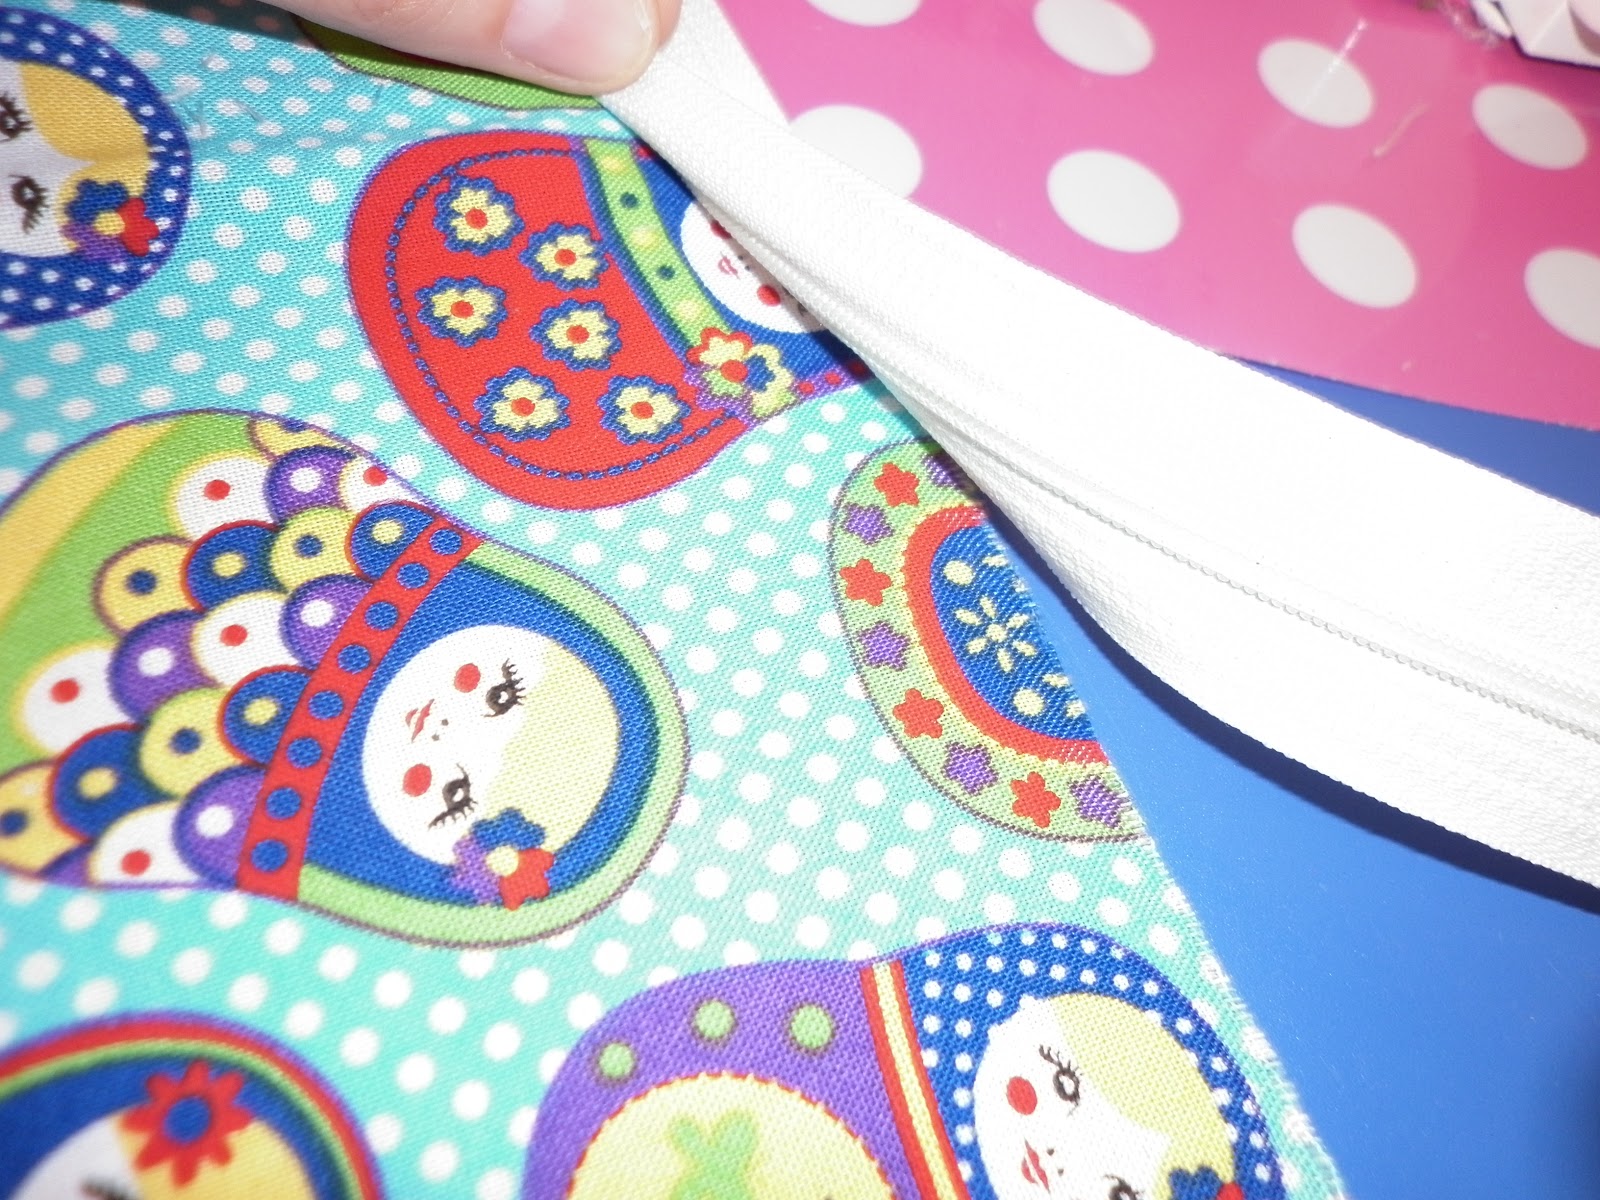
The next step is to sew the lining right side facing up to the same edge of the zip as pictured. (once you are a little more confident you could combine these 2 steps and sew the outside fabric and lining with zip sandwiched between)
Now repeat this process for the other side of the zip.
You may want to iron the purse at this stage, being careful not to iron directly on the zip.


Swap you zipper foot back to your normal presser foot for the rest of the process. Take your piece of ribbon, fold in half, and pin to one piece of the outer fabric. Pin the ribbon on the right side of the outer fabric so it won't get caught when you sew the purse up.


Undo the zipper 3/4 of the way open like this. 


Now here is where it gets a little tricky - open up and pin your purse like so,  leaving a gap in the bottom of the lining to turn your purse inside out (I have used yellow tailor's chalk to show the gap).

I hope you can see the yellow tailors chalk!

To avoid severe 'pinching' around the zip you need to make sure that the zipper teeth are sewn toward the lining.  At the open end sit the teeth flat like in this picture:


 At the closed end of the zip,  'roll' the zip toward the lining like this:


Now it's time to sew it up!  start at the bottom of the lining (leaving a gap) and carefully sew the whole way around finishing at the bottom of the lining. 
Clip your corners carefully and trim back the seams (except the seam with the opening), as well as cutting off the excess zipper at each end.


Now the reveal!  pull the purse through the gap in the lining and then through the open zipper and hey presto a purse!! Be careful, remember there is a pin in there holding the ribbon tag.

 
Push out the corners of the outside of the purse.

 
Now sew up the lining gap, and we're done!


These are great and quick to make, and also you can patchwork the outside of the purse to use up your scraps of fabric.  I may have started to breed them!  Adjust the size, add milk bottle corners - once you master the basics the only limit is your imagination, Enjoy!!
Don't forget to leave me a comment!

Heidi xo


Tuesday 19 February 2013

A lunch bag!

I did make this some time ago, its from a wonderful book called The Crafty Kid, by Kelly Doust (an aussie!)  It is super easy to make.  I used the instructions in the book, but there is a similar tutorial here from Martha Stewart for an oilcloth lunch bag.  Rather than a peg to hold it together, I used velcro to roll down to close - I little hint, stick on velcro is great!  I also modified the pattern and added a handle.  This is the first one I made and stuck to the pattern.
 
 
This was made using mexican oilcloth, it comes in gorgeous bright colours!!
This is just a quick little post...  I have much more to show you very soon!!
 
 
Heidi xo

I am still alive!!

It has been too long since my last post but I am still here!  Christmas, New Year and a milestone birthday for myself have all come and gone...  at last I have some time to myself to write my blog.

 
This is the wonderful cake I was surprised with on my birthday - how great is this?! I was lost for words when I saw it. I really didn't want to cut it! But it had to be done, and it was a delicious chocolate mud cake, yummmmm.....  The cake was made by my sister's, sister-in-law and she did an absolutely fantastic job! Here she is on facebook -Caketivity
 
 
These are 'lolly bags' ready to take home for all the guests.  All the bags were done up with pictures of me, at different ages - I loved them!!
 
 
Here are some of the yummy lollies!
 
And the table laid out, some very yummy pink and blue cupcakes off to the right, made by my sister-in-law.  My favourite colours are pink and blue, does look a little like a baby shower - didn't realise until I saw the colours together.
As you have probably guessed, it was an afternoon tea - I'm getting a little old to be off partying to the wee hours.. This was all put on at my parents, Mum did the organising and worrying (thank you:)) and I got to sit back and relax and enjoy it with my family and friends.
 
Heidi xo

Tuesday 2 October 2012

A little bit of 'Sewing Past'


My sewing machine has been a little quiet over the last few weeks - my quandary is 'sewing or housework?'  Unfortunately housework has been the winner, not that others in the house would necessarily agree (i.e me a good housekeeper?).  So I'm revisiting some of my past creations. I'm a little, a Huge fan of Cath Kidston and her gorgeous rose prints, very english, shabby chic.... Now she is UK based, so the cost of the her fabrics and her other delectable homeware's are, unfortunately out of my price range so I look for fabrics here that are CK inspired instead and create and sew accordingly.


This is an apron I made for my sister's birthday, very shabby chic!


And I made her a matching bag!


I also have 3 of Cath Kidston's books, Sew! Make! and Stitch! All 3 contain wonderful crafty projects to make and inspire you! 
So now you know,  I'm a Cath Kidston fan - check out her website here.
 
 
Heidi 


Friday 28 September 2012

School Holidays mmmm...

I'm not sure about you,  but I love and hate school holidays.  We get a sleep in, there's no great rush in the mornings.... but then if you're getting up late you just don't seem to get much done in the day.
I always have BIG plans (like sewing and maybe getting the kids to tidy their rooms) but they all seem to fall by the wayside as I struggle with housework and spending some quality time with my children.  The first day of the holidays we made 4 lots of different coloured playdough - there was flour everywhere!  and by the time I sent them outside to play with the playdough (which they did for only half an hour) I was still cleaning up the kitchen for the next project - lunch!  

 
We made some very yummy pizza scrolls, and vegemite and cheese scrolls for lunch.  We had Pink Lemonade with it, which oddly enough was lemon lime flavour? 
 
 
We also made jelly in oranges. I have been wanting to try this out for a while and as you can see, I finally did.  I've seen it done so many times in rainbow colours for kids parties and it looks great, however there must be a trick to cutting them once the jelly is set as my jelly kept getting squished, maybe my knife wasn't sharp enough to cut the orange neatly? Let me know if you have any hints or tips on this one.
 
So anyway, till next time!
 
Heidi


Sunday 16 September 2012

100 days to Christmas!!

Less than 100 days until Christmas!   Are you organised?  I'm not,  I have plans to make some wonderful goodies for Christmas presents. So now it's up to me to put this plan into action! Time to set aside a few hours a week to sew and make a list of recipients for these items and still yet to make. 
 
 
This is a tote bag set I made for a teacher a few years ago, (sorry about the photo quality, the laptop died that had the original image). Both bags are fully lined, and the owl on the front  of the tote is also a pocket.
 
 
I also have made this lunch bag - its lined with oilcloth for easy wipe clean.  Maybe something like this for a friend or even a teacher?
 
I find the hardest to craft presents for are men. My son had a male teacher last year so there were no handmade goodies for him, found out which footy team he barracked for and went with a gift that way.  Does anyone have any suggestions for a male?


 I've had an obsession this past year with mexican oilcloth - here are some goodies I've made. Some extra roomy totes, a lunch bag and also a cosmetic purse. All co-ordinating wonderfully.  I will definitely be making some more of these oilcloth lunch bags, they are very cute - I modified the pattern and added a handle, they will be very easy to carry now, my daughter has already put in her order.
 
I also need to finish a few projects - I have many! How about you? do you get sidetracked with something new too? There is some gorgeous vintage inspired bunting just waiting to be strung together, and skirts with just the elastic waist to sew.  I am setting aside a day this coming week to complete some projects - no more procrastinating!
 
I will post pictures of my progress along the way, and maybe my first tutorial, any ideas on what you'd like that to be?


Heidi
 

Thursday 6 September 2012

I've made it, the Fabric Purse

I've finally had a chance to do some sewing!  I've made the pouch from the Tilda Magazine I talked about in my last post.  It was super easy, and took only 30 min's from start to finish - very quick.


These are the pattern pieces, only 2, very simple!


Very easy to follow instructions - and wella! all done, now just turn half back in on itself.


All done! Now just to hand sew the clip on.  That may take a while, I procrastinate when it comes to hand sewing, what do you think? Do you like fabric I chose?
 
Heidi